
Your Phone's Camera Isn't the Problem - Here's What Actually Makes a Photo Look Amateur
PixelTouch: Photo Editor & Filters layers portrait retouching, background blur, and filter presets into one editing pass - a look at which single step does the most work in turning a decent shot into one worth posting.
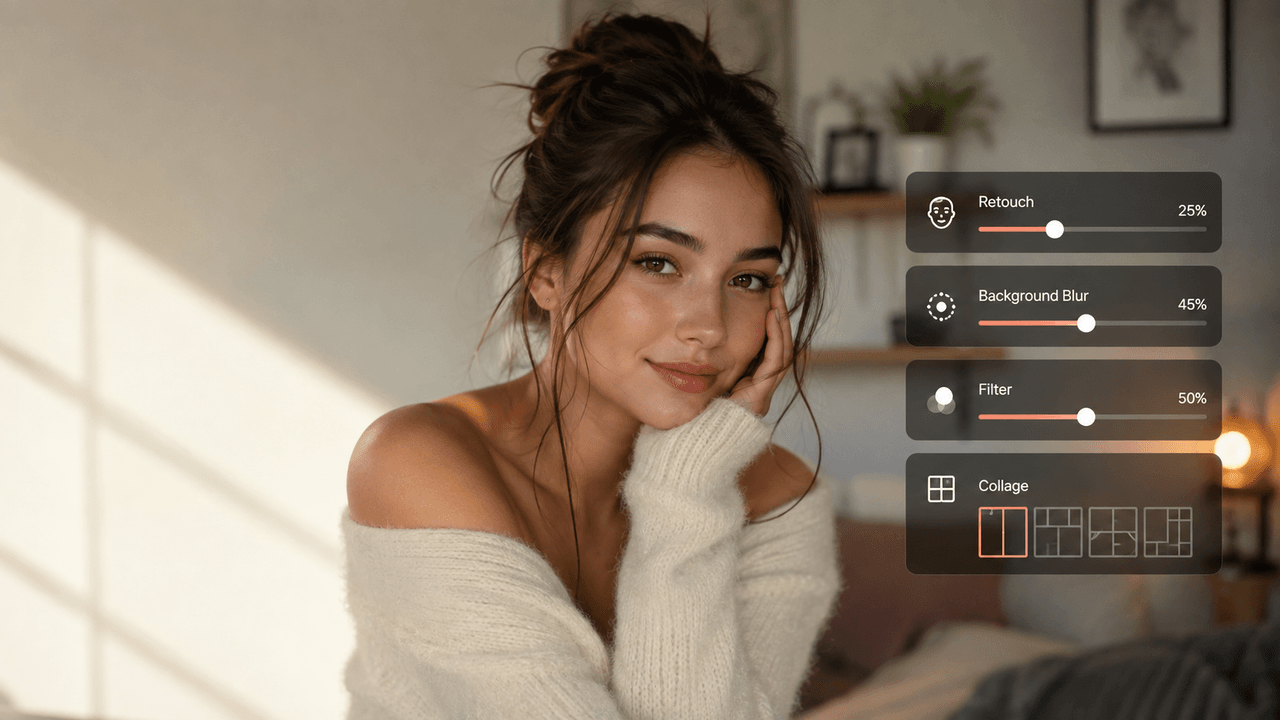
Key Takeaways
- Filters go on last, not first - they just tint whatever's already in the shot, so a blemish or a messy background behind you is still there, just tinted.
- Keep the retouch slider around 20-30%. Push it toward 100 and skin goes from "smoothed out" to that waxy, over-edited look people spot instantly.
- The background blur is faked with edge detection rather than a real depth lens, and it still struggles with flyaway hair against a busy background.
- Filters land better around 40-60% strength - full intensity is usually the thing that gives away that a photo went through a filter app at all.
- There's a built-in collage tool too, which quietly fixes the annoying problem of a multi-photo post looking mismatched because each shot got edited in a different app.
About this app
Two people take the same photo, on the same phone, in the same light, and one of them looks like it belongs on a magazine cover while the other looks like a screenshot from a group chat. The gap almost never comes down to the sensor. It comes down to what happens in the ninety seconds after the shutter clicks, and most people skip straight past the part that actually matters.
PixelTouch: Photo Editor & Filters is built around that ninety-second gap. It bundles portrait retouching, background blur, and a filter library into one app, and the interesting part isn't any single tool - it's the order the app nudges you to use them in. That order turns out to be the whole story.
The mistake almost everyone makes first
Open nearly any photo app and the first button you'll tap is a filter. It's the fun part, it's one tap, and it makes an immediate visible difference. The problem is that a filter is a color and contrast adjustment laid on top of whatever is already in the frame - stray flyaway hairs, a blotchy patch of skin, a cluttered background, uneven exposure across a face. A filter doesn't fix any of that. It just tints it.
That's why a heavily filtered photo of a messy shot still reads as amateur, just amateur with a mood. The retouching has to happen first, on the unfiltered image, while the app can still tell the difference between "shadow that belongs there" and "blemish that doesn't."
PixelTouch's editing flow forces this sequence almost by accident: retouching and background tools sit on the first screen after import, filters live on a second tab you have to swipe to. It's a small piece of interface design, but it quietly fixes the single most common workflow mistake in phone photography.
What the retouch layer is actually doing
The retouch tools - blemish smoothing, teeth whitening, under-eye correction, skin evening - work on detected facial regions rather than a blanket smoothing pass over the whole photo. That distinction matters more than it sounds like it should. A blanket smoothing filter softens skin texture along with everything else in the frame, which is why over-processed portrait shots have that waxy, plastic look people notice immediately even if they can't say why.
Region-based retouching only touches the areas it's identified as skin, and even there it works in degrees rather than an on/off toggle. Dragging the intensity to 20-30% removes the temporary stuff - overnight puffiness, a stray blemish - while leaving pores, freckles, and actual skin texture alone. That's the setting worth learning, because the difference between "looks like a good photo of you" and "looks like a filter" usually comes down to stopping at 30% instead of sliding all the way to 100.
Background blur without a portrait-mode lens
Depth-sensing cameras that produce a real optical blur are still mostly a flagship-phone feature. PixelTouch fakes the effect computationally: it segments the subject from the background using edge detection, then applies a graduated blur to everything behind that outline.
The honest limitation is hair. Fine, flyaway strands confuse any edge-detection algorithm, phone hardware or software alike, and you'll sometimes see a slightly hard edge around hair against a busy background. The fix is one most people never find: nudging the blur radius down a notch and the edge feather up a notch trades a little bit of blur strength for a cleaner outline, and for anything posted at normal social-media resolution, that trade is invisible.
Where this tool earns its keep is the situation everyone actually has: a decent photo ruined by a cluttered background - a messy kitchen counter, a parking lot, a room mid-renovation. Rather than reshoot in better surroundings, blurring the background into soft, out-of-focus color does most of the work a real lens would have done.
Filters are a finishing touch, not a fix
Once retouching and background work are done, the filter library is genuinely just a finishing touch - and that's exactly the role it should play. Warm-toned presets for outdoor golden-hour shots, cooler high-contrast options for indoor or urban photos, and a handful of muted, low-saturation looks built for the "consistent feed" aesthetic that a lot of people are actually going for on Instagram now, rather than punchy oversaturated color.
The presets are adjustable rather than fixed, with sliders for intensity, warmth, and grain sitting under each one - worth using, since a filter applied at 100% strength is almost always what makes a photo look processed rather than photographed. Dropping most presets to somewhere between 40 and 60% keeps the mood shift without the "obviously ran through a filter app" tell.
The collage and layout tools are the quiet bonus
Buried past the single-photo editor is a multi-photo layout tool - grids, side-by-sides, and story-format templates sized for Instagram Stories and Reels covers. It's a small feature next to the retouching and blur tools, but it removes a genuinely annoying step: exporting to a separate collage app, then reimporting for one last filter pass. Handling both inside one app means the retouching and color grading stay consistent across every photo in a layout, instead of four photos edited in four separate sessions and looking subtly mismatched side by side.
The actual takeaway
The camera on a modern phone is not the bottleneck anymore, and hasn't been for a while. What separates a photo that looks intentional from one that looks like a snapshot is almost entirely in the editing order: fix the actual imperfections first, shape the background second, and let color grading be the last five percent rather than the first move. PixelTouch doesn't do anything a skilled person couldn't do with more time and more separate apps - it just puts the steps in the order that actually produces a good result, and makes it hard to skip straight to the fun part.
Frequently Asked Questions
What order should I actually be editing in?
Retouch and fix the background first, filter last. A filter can't cover up a blemish or clutter in the background - it just tints the whole photo, imperfections included.
Why do some edited photos end up looking kind of fake or "plastic"?
Almost always because the retouching got pushed too far. Sitting around 20-30% removes the temporary stuff - a blemish, some puffiness - without smoothing away the real texture of your skin.